NAT Loopback via Synology DNS Server
This Blog Post describes how you can create manually an NAT Loopback with your own DNS Server.
You need this if you want to access with the same device an IP address inside and outside of your network.
But first lets start at the beginning.
What is NAT Loopback?
I will describe this with the password program Enpass.
This program can save the data on your own NAS via WebDav.
This means the data is not stored in the WEB instead it is saved at your local NAS.
To do this you need to set up a WebDAV on your NAS (this will be another blog post).
After setting this up you can add the IP and the port of the NAS WebDAV in Enpass to save and sync your passwords.
This will of course work at the moment but if the notebook is outside of your network this won’t work anymore.
The probelm is that your local IP is not accessable outside of your network.
The solution seems is to add instead of the local IP the external domain address who is pointing to the NAS WebDAV.
In my case this would be www.chrisonline.at. But this is sadly not the case because if you are in the internal network you will go trough the router outside and immediately afterwards it turns back to your internal network.
This will confusing the router and he is blocking the request if the router does not have a “NAT Loopback”. And sadly most home routers doesn’t have this.
How we solve this problem?
An internal DNS Server can help.
The purpose of the whole thing is that this DNS server converts the external domain / address into an internal one when you are in the internal network.
So www.chrisonline.at becomes 192.168.1.50 in the internal network.
However, if you are outside then www.chrisonline.at correctly becomes the external IP address for me 212.x.x.x.!
How we can set up this?
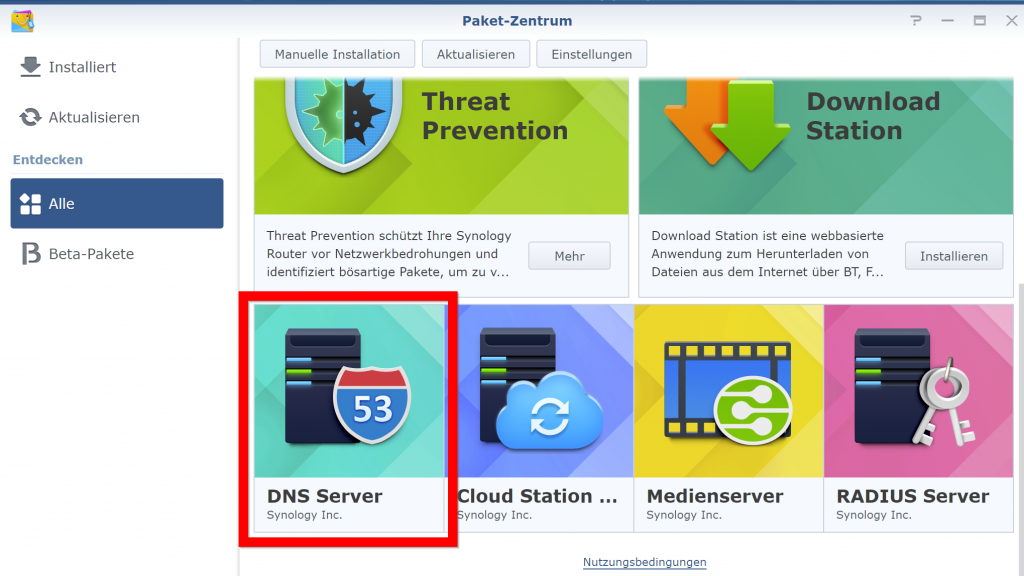
1 – Installation of the Synology DNS Server App (Install it on your Synology Router or NAS)
Open Packet Center and “All”. Now search for “DNS Server” and install it.
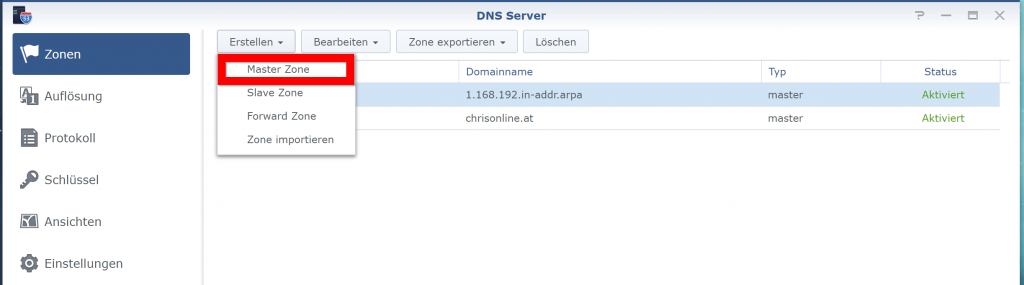
2 – After the installation of the app start it and select “Zones” and afterwards add an “Master Zone“
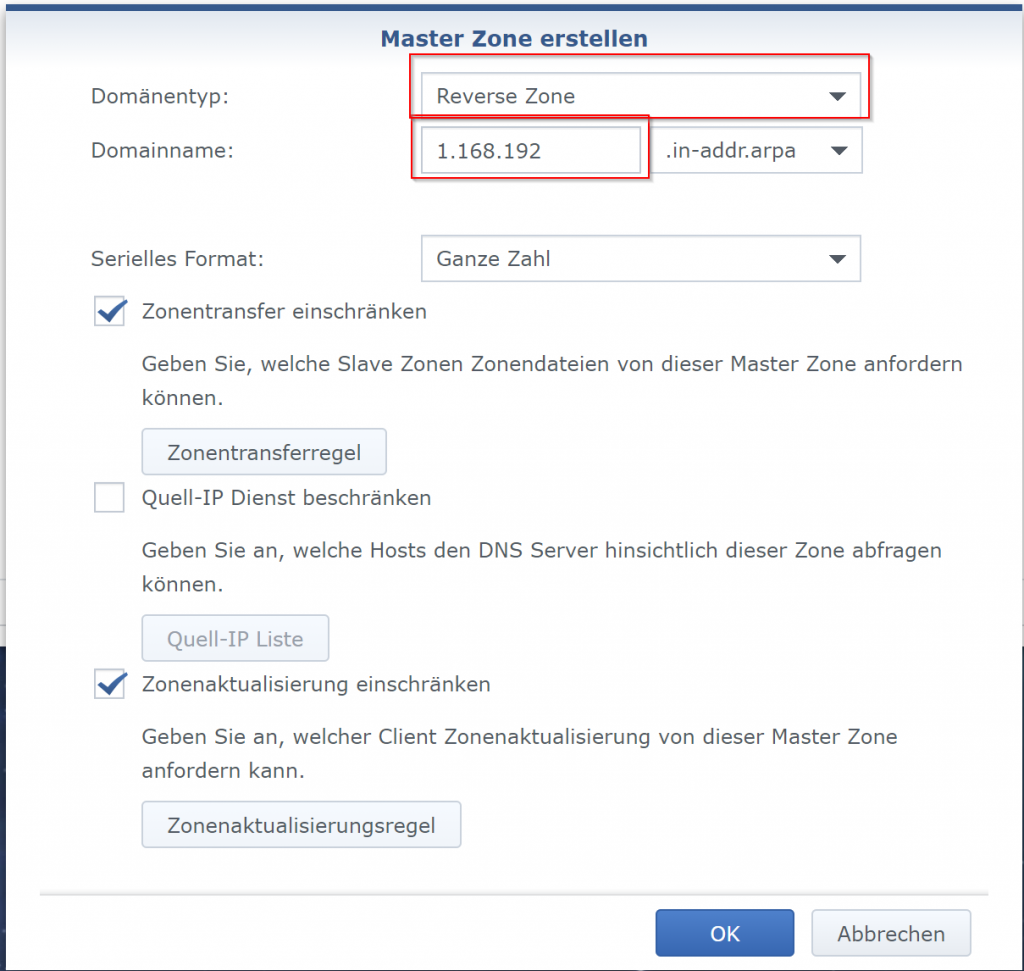
3 – As Domaintype select “Reeverse Zone“. At Domainname add your internal IP address backwards without the last pair.
Exampe: 192.168.1.50 is the internal NAS address. So we add 1.168.192
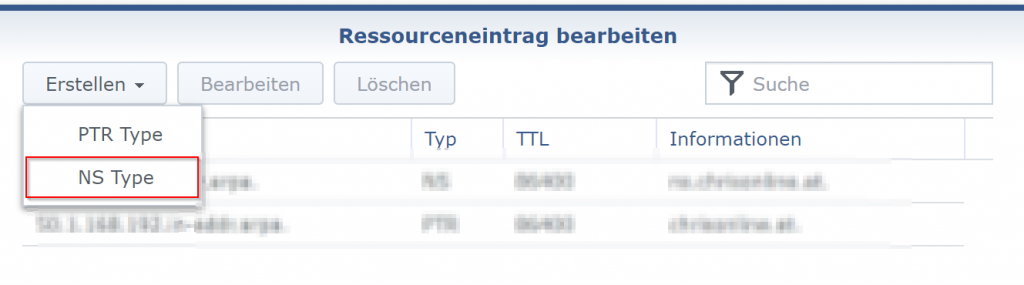
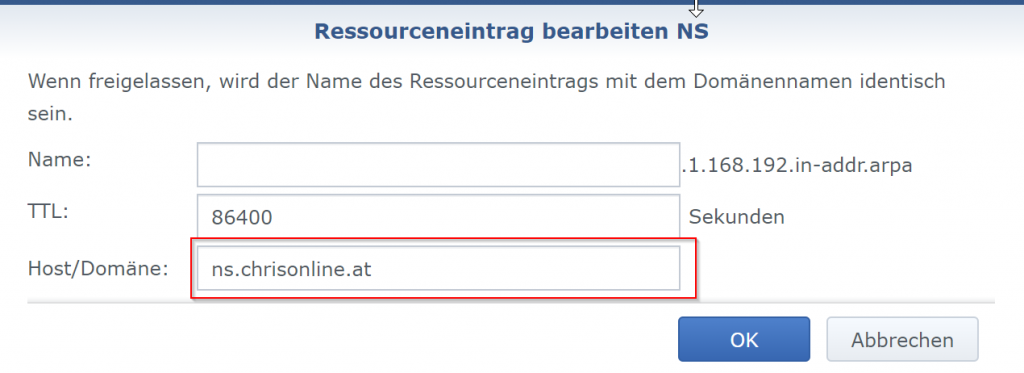
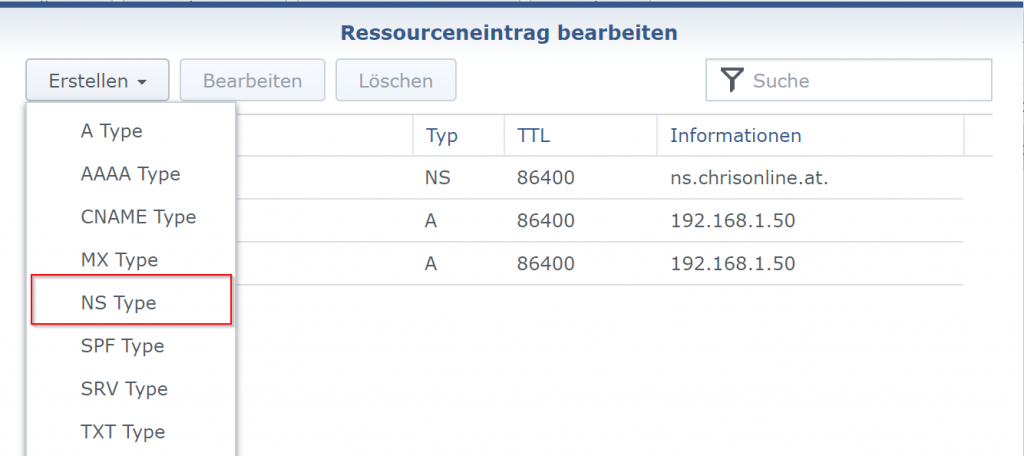
4 – After the creation make an double click and open the new entry. Now create an “NS Type“
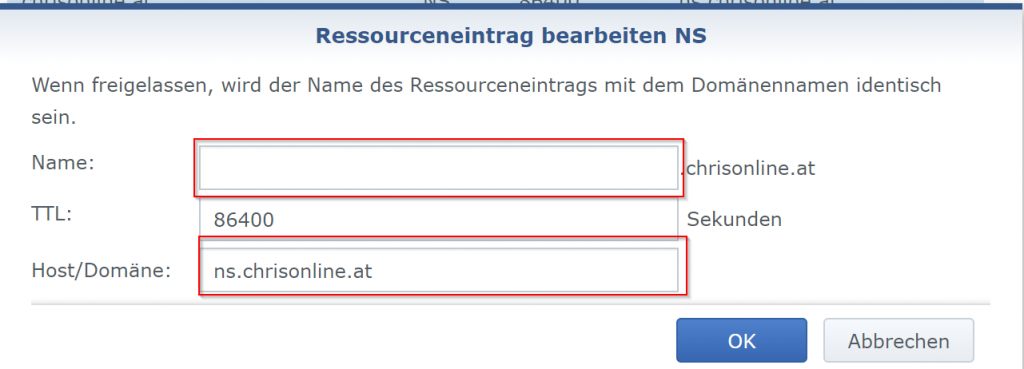
5 – At “Host/Domäne” add ns.yourdomain.at (in my case it is ns.chrisonline.at)
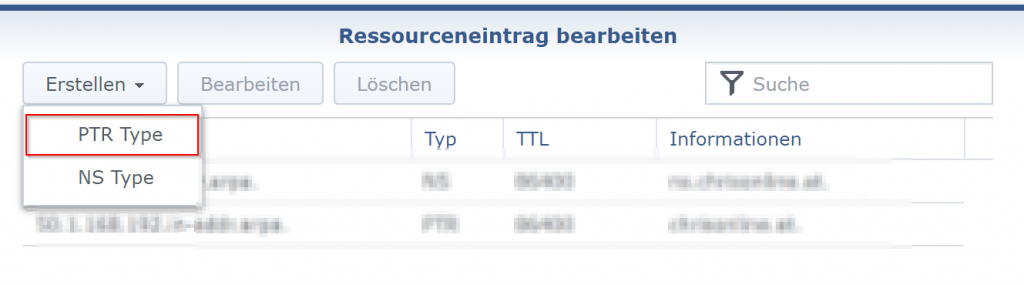
6 – Now add an “PTR Type“. Again create and select “PTR Type“
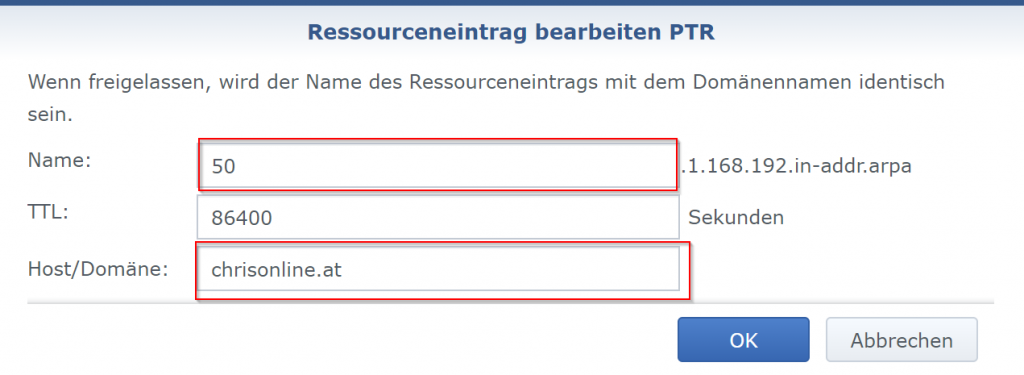
7- As “Name” the last pari of your interanl IP address. (in my case 50 for 192.168.1.50)
“Host/Domain” add your domain name without www.
8 – Now we need to add an additonal “Master Zone“. At this time we need the type “Forward Zone“

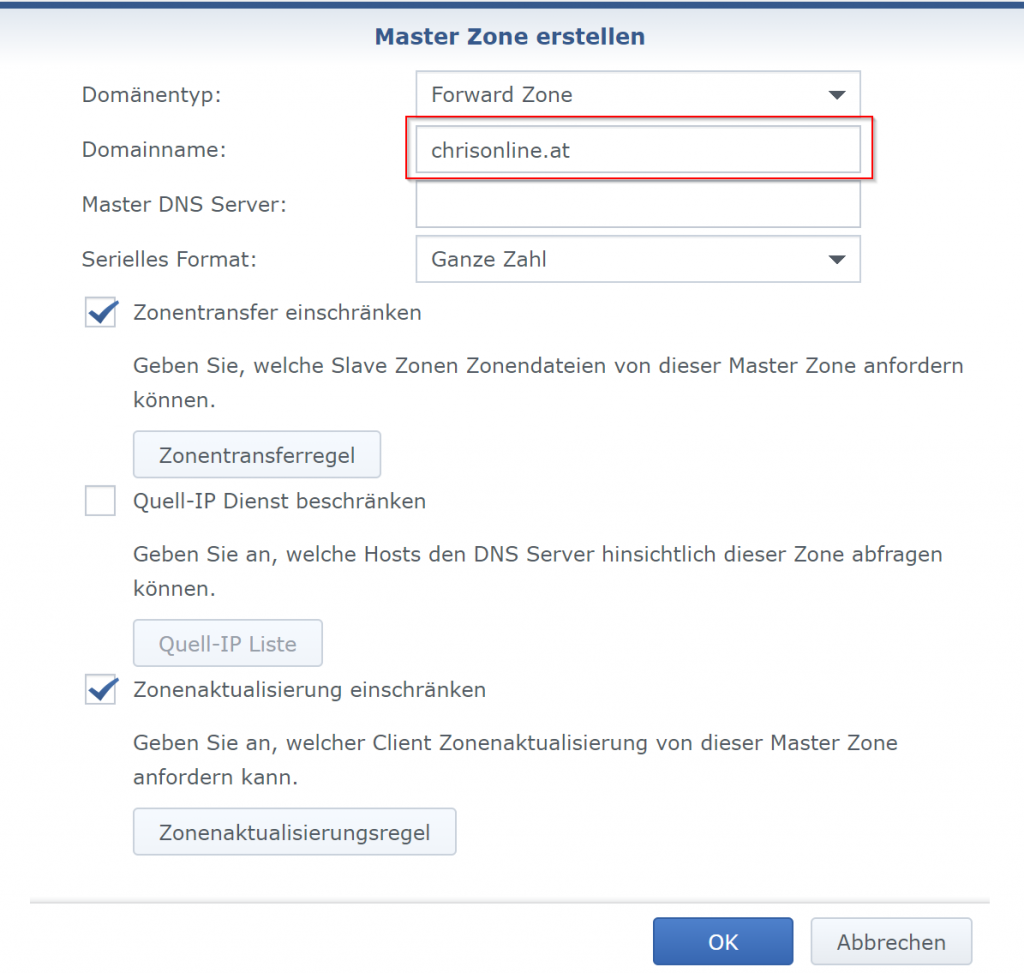
9 – After the creation do again an double lcik and add an “A Type”
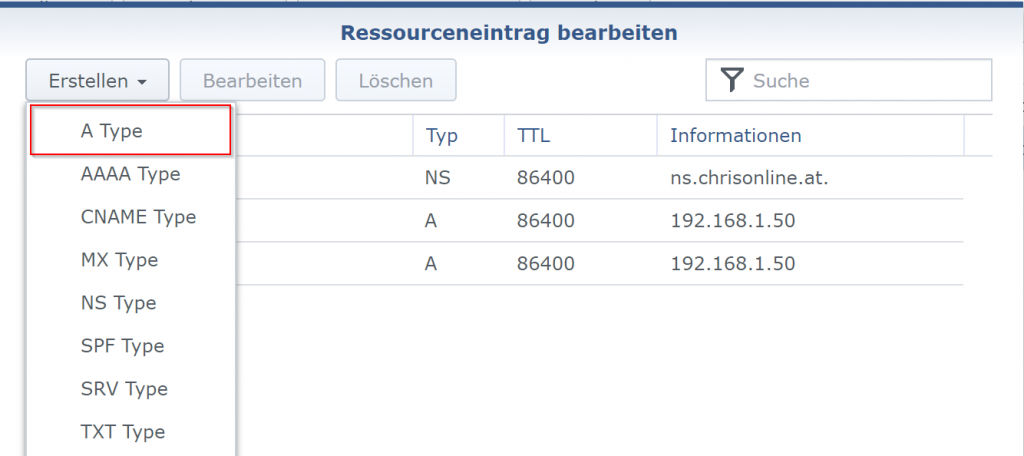
At “Name” enter “ns“.
At “IP-Adress” it need the address where it should be forwarded to (in my case it is the IP from my NAS)
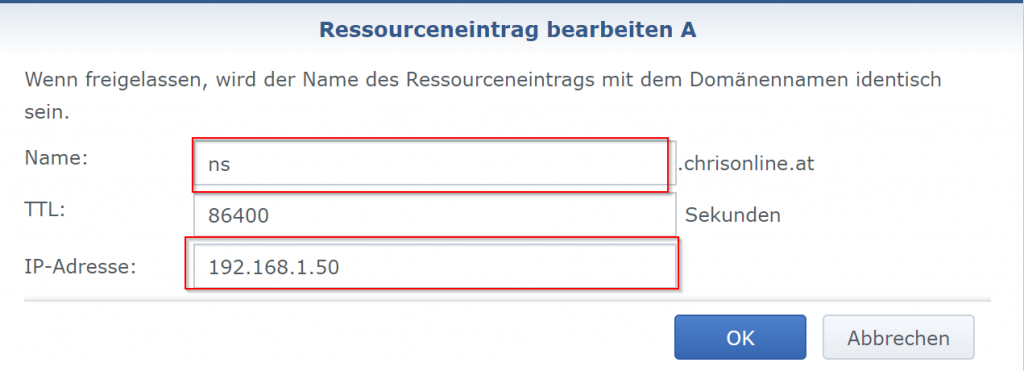
Click on “OK” and add another “A Type.
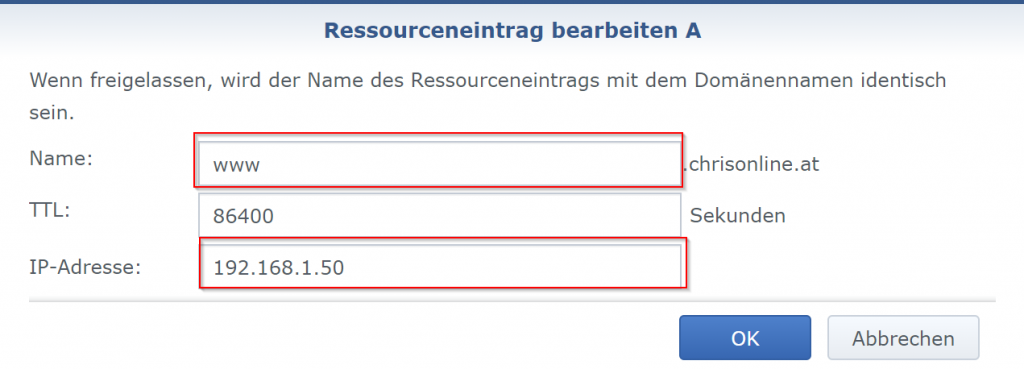
Now at “Name” add “www” and at “IP-Adress” again the same as at “ns” above.
10 – Create now an “NS Type“
Leave the field “Name” empty and at “Host/Domain” ns.yourdomain.xx (instead chrisonline.at enter your domain name)
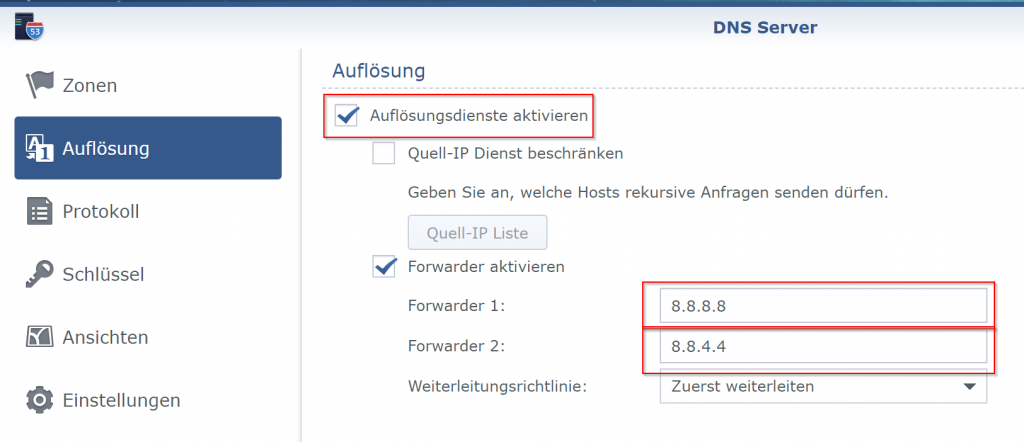
11 – The last step is now to activate the Resolution Service and activate also the “Forwarder“.
In the Forwarder 1 and 2 you need to enter an external DNS Server (in my case they are the Google ones).
This DNS Servers are always used if our new created DNS Server does not resolve it.
So it will contact this DNS Server always except if you access our domain.
That’s it now you have an own DNS Server with a NAT Loopback!